
Cleaning the bike chain is a guarantee of longevity, and that is precisely the purpose of this write-up. You all want your bike to serve you extensively without thinking of replacement, right? The secret lies in keeping the chain clean.
Table of Contents
How To Thoroughly Clean Your Bike Chain
What might be critical when cleaning your bike? Well, it is a biting question that many cyclists would want to have satisfactory answers. The cool thing is we will guide you to the end and empower you with the right knowledge about how to clean the bike chain.
When you understand the role of chain to your bike, then maximum care is inevitable. For instance, the chain affects the performance and the efficiency of your bike. As such, it must be clean of dirt and be in sound form.
However, you must understand the standard procedures of how to take care of the chain. When done in the right manner, you procure the lifespan of your bike.
Here is how to clean a bike chain.
1. Prepare & Remove Chain
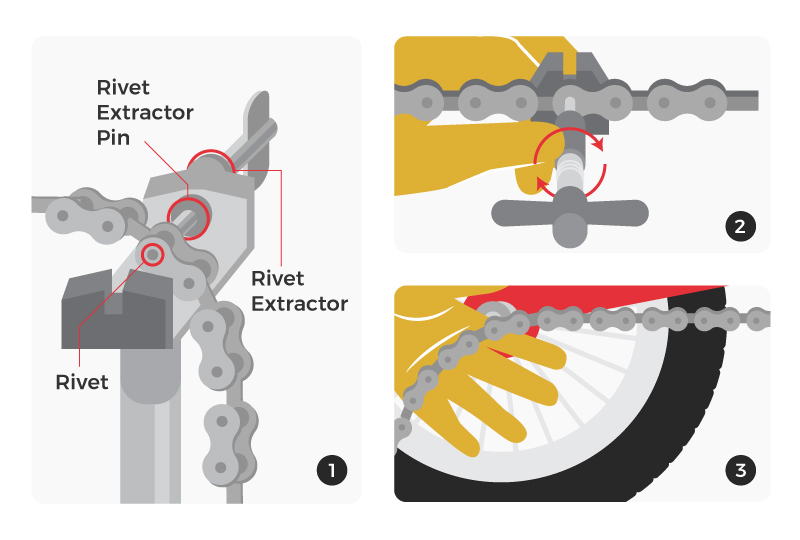
If you have the correct tools, the process of chain removal is simple. The kind of the chain your bike has will dictate the type of procedure to follow. Check the links to establish if they are identical.
Begin by removing the regular link chain. Using the chain tool, push the rivet out of a chain link until the chain comes apart. Locate any link on your bike chain and insert the pin. Involve the chain tool to push this pin out of the rollers. As such, the chain will come apart.
Allow the pin to make direct contact with the chain-link center. As you begin to rotate the handle, the center pin (the rivet pin) gets pushed out of the chain. Let not the tool deform the outer link of the chain. Finally, take off the chain out of the sprocket of your bike.
2. Wet Cleaning
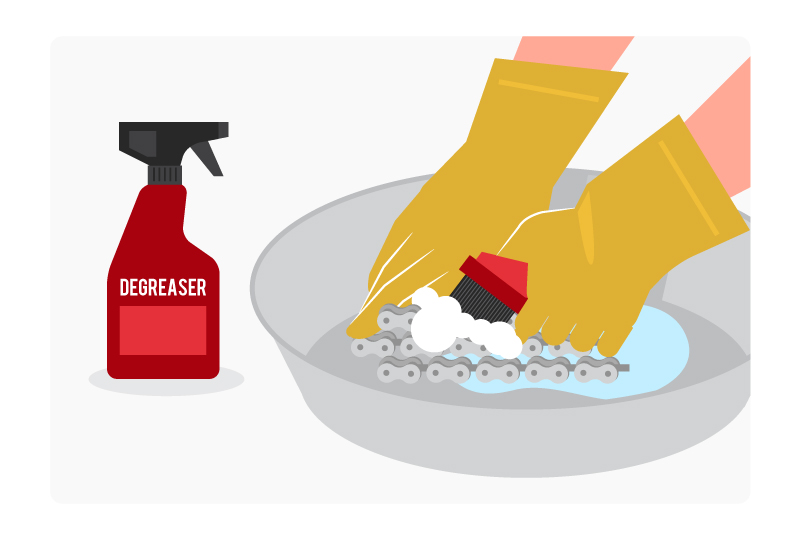
Ensure that you have the right tools to facilitate your cleaning. They include gloves, water to rinse a cog brush, a citrus-based degreaser, and a container to store your degreasing bath.
Firstly, assess the state of your chain. Ensure that there are no worn- out components or the ones that need replacement. Put the chain in the degreaser bath and clean it manually. Use the cog brush to remove dirt effectively.
Another option is to place the chain in the degreaser bath and begin to shake it thoroughly. Once you establish that the chain is clean, you can now rinse it in water thoroughly.
It is noteworthy that you use only environmentally friendly degreasers. Also, use stainless steel laundry sink as your washing basin. After completing the cleaning exercise, dry the chain awaiting reattachment.
3. Prepare Chain For Reattachment
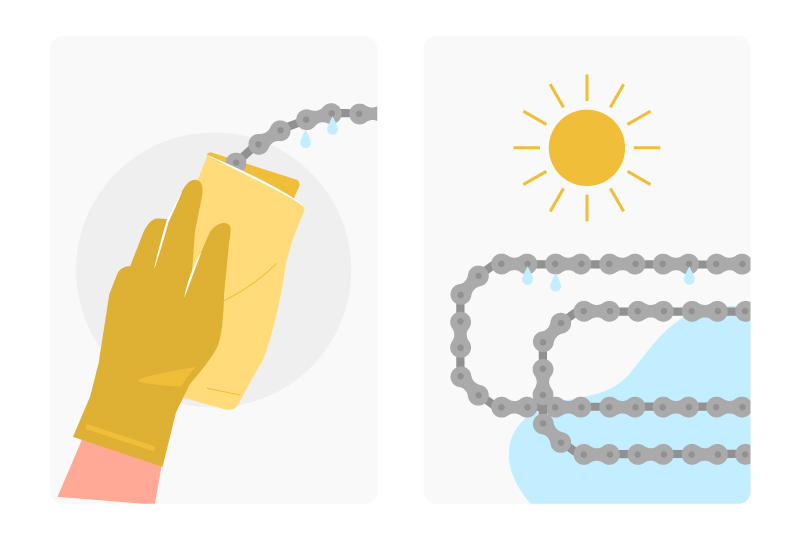
After washing the chain in a degreaser bath and later rinsing it in hot soapy water, it is time to dry it. The chain must be dry enough to facilitate the remaining processes. You can dry the chain in direct sunlight to ensure it is no longer wet.
The user can pacify the process by using a rug to eliminate any wet elements on the chain. Dry it properly for it to be effective on the next assignment.
4. Attaching Chain
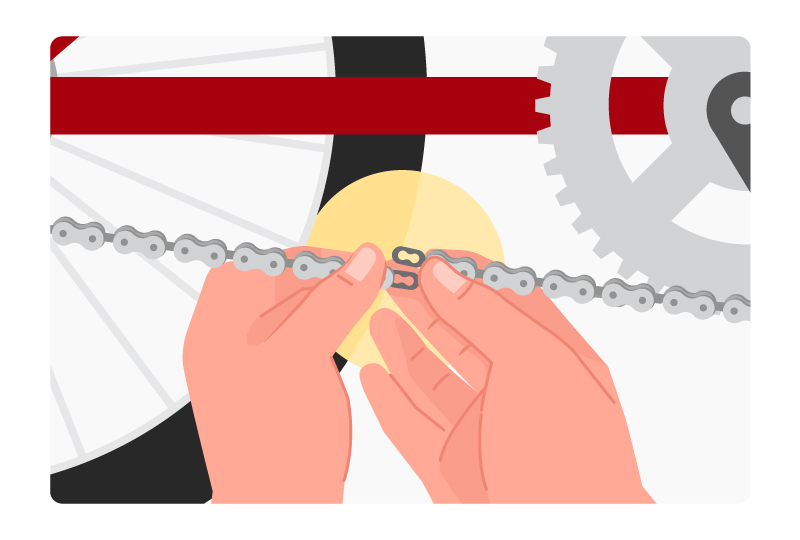
You may need a chain tool and the chain itself to complete the process. Ensure that you have a replacement pin for connecting the chain. Begin by laying the bike on the side while the sprocket is up. If the chain has a special replacement pin, then your work becomes effortless.
Next is to thread the chain via the rear derailleur. You can turn the back wheel to simplify the process. Derailleur arrangement is critical here. Suppose the rear derailleur has a connecting cable to the shifting mechanism; you can shift to the highest gear.
As if that is not enough, pull the chain via the rear derailleur. Threading the chain helps in smooth and safe riding. If done right, the chain can now move smoothly straight and backward through the derailleur.
You can now weave the chain via the front derailleur cage. Thread the chain’s lead end via the front derailleur as you turn the rear wheel for better alignment. Also, work the same chain onto the bike’s front sprocket. You can stretch it to engage it with the teeth securely on the front sprocket.
Finally, connect the two ends of the bike chain. Your chain should pass through your gear systems securely before you join the ends. You can now begin to ride your bike.
5. Apply Lubricant
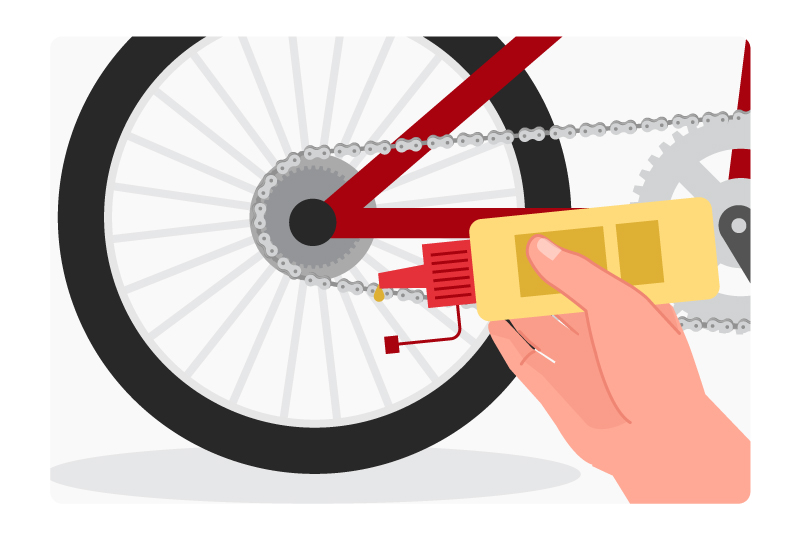
Lubrication improves the performance of your bike chain and prevents premature wearing. Choose the right lube that tolerates the conditions you are riding in.
For instance, you can settle for the wet lube if you are cycling in wet weather. In other words, snow, rain, or slushy road can wash away the lube of the chain hence the need to have a lube that is more resistant to such a condition.
You can avoid the wet lube for those operating in dry areas such as semi-arid regions. That is because it may attract more dirt than the dry one. The only downside about the dry lube is that one should apply it frequently. It should happen for every fifty to a hundred miles.
The good news is the dry lube keeps the bike cleaner. Another alternative is to acquire a wax lube because it is less messy than the two above. For example, it will not get over your clothes as you cycle around. Also, wax lube will keep the chain cleaner since it sheds grit and dirt from the chain.
You can avoid the WD-40 solvent to lubricate the chain since it evaporates within no time. It only contains a minor fraction of the lubricant. It also causes the accumulation of grime and dirt on the chain.
Quick Bike Chain Clean
You can clean the chain effectively without removing it from the bike. You can begin by following the steps below:
- Spray isopropyl alcohol or degreaser spray onto an old rag. Let the spray be moderate without soaking the rug.
- Rub the chain with the sprayed rug to eliminate dust on the chain.
- Suppose the chain is not harboring a lot of dirt, then use the dry rug. Hold the rug against the bike chain firmly.
- Begin to backpedal the chain to allow it to run through the rug.
- Keep on backpedaling as the chain slides through the rag several times. You must be cautious not to catch the fingers between chain rings and the chain and cause some injuries.
- Use a chain scrubber for a quick solution if you do not want to clean the chain by hand. You can use a two-piece plastic chain scrubber, which is available in the shops.
- The chain scrubber will work by clamping around the chain. Furthermore, it has a reservoir for degreasing. It also has rotating brushes that will clean the chain.
Alternatively:
- Get yourself hot soapy water and a rag.
- Deep the rag in the hot soapy water and begin to wipe the chain as you pedal with your hands. As the chain moves, the rag will be eliminating dust and grime on the chain.
- Rinse the cloth multiple times, and you repeat the above process until the chain shines.
- Allow it to dry. After that, you can now apply the lube as appropriate. Use the right lube to get better results.
Why You Should Clean Your Bike Chain
A bike chain plays a critical role in transferring power from the pedal to the wheels. The chain comes from metal materials with some moving parts, including the pins, rollers, and plates. Chain cleaning comes in handy to solve particular challenges and overcome them.
Here are reasons why you should keep your chain clean:
It Extends The Life Of The Chain
One of the most common challenges is the metal to metal friction. If the chain is dry, having accumulated the dirt, it will wear out easily. When you clean it, it will reduce the friction between plates and rollers and function effectively.
Dirt is the number one accelerator of friction, thereby causing regular wear out. It is vital that you keep the bike chain clean. The chain link will remain more flexible and serve you extensively. As you maintain regular chaining cleaning, it will increase its lifespan by more than four times.
It Is A Protection Against Environmental Conditions
Some environmental conditions will work against your chain. They may include rain, sand, mud, snow, and more, thereby increasing friction and rusting. If it develops the rust within a week or two, you need to clean it with a proper solution to prevent further wear.
After you complete the cleaning exercise, you can add the lube to protect it from such harsh conditions. As you apply the correct lube, it saves your chains against further wearing and increases its lifespan.
It Eliminates Chain Noise
If the chain is dirty and dry, the first indicator is the noise. The chain will become louder during cycling. If you sense some more squeaking, then you should perform a thorough cleaning and apply the lube to put it in proper form.
It is a DIY affair. Once you get at home, perform a quick cleaning process as indicated in this write-up and dry it. Later, you can apply the lubricant to make it sound quiet.
Improved Shifting
One of the key performance indicators is shifting. The challenges of bad shifting will make the rider move slowly, thereby reducing efficiency. You should clean the chain and ensure that it is a sound form to perform well.
It Saves Money
Keeping the bike chain clean is a way of increasing its performance. By eliminating dirt that can attract rust and friction, you will be prolonging the bike chain’s life. If it serves you for long, you will appreciate the value of every penny spent.
How Often Should You Clean Your Bike Chain?
The issue of bike cleaning may not have a straight answer. It will depend on multiple factors that can compel you to make the decision or not. You can choose to perform a quick cleaning or a thorough one. You can choose the appropriate one as per the situation you are in.
For instance, if you are a frequent bike user who rides in remote conditions, you can clean your chain weekly or bi-weekly. Remote conditions such as dust, mud, rain, and snow are the greatest contributor to chain wearing.
You should ensure that the chain does not accumulate dirt for long as you operate in such conditions. That calls for regular cleaning to add more life to your chain and avoid wearing or breaking.
On the other hand, you rarely use the bike; frequent cleaning is not necessary. The rate of dust accumulation is low. More so, the exposure to remote conditions is minimal. You can clean it monthly as a routine check.
The chain happens to be the heart of your bike. Without it, the wheels cannot rotate while pedaling. Bearing that in mind, you must maintain it by performing regular cleaning. If the bike chain is clean, it will serve you efficiently.
Bike chain cleaning is usually a DIY task. If unsure, then you can consult the services of a professional. The good news is you can perform it alone and save on costs. The only secret is to follow the correct procedures and nail it.
At last, your bike chain is cleaner than ever before if you follow the advice as given in this piece. If you have a clean chain, it remains strong and serves you for a longer duration. Knowing how to clean a bike chain gives you an edge.