
We all love receiving packets, even if you bought it yourself, it feels like a gift from us to us. But nobody likes to assemble whatever they bought, especially if it’s taking longer than you thought. But don’t worry, installing a bike rack is very painless, once you know how.
Here, we are going to walk you through the simple steps of installing a bike rack, secret tip. It all starts with the choice of rack you purchased.
Table of Contents
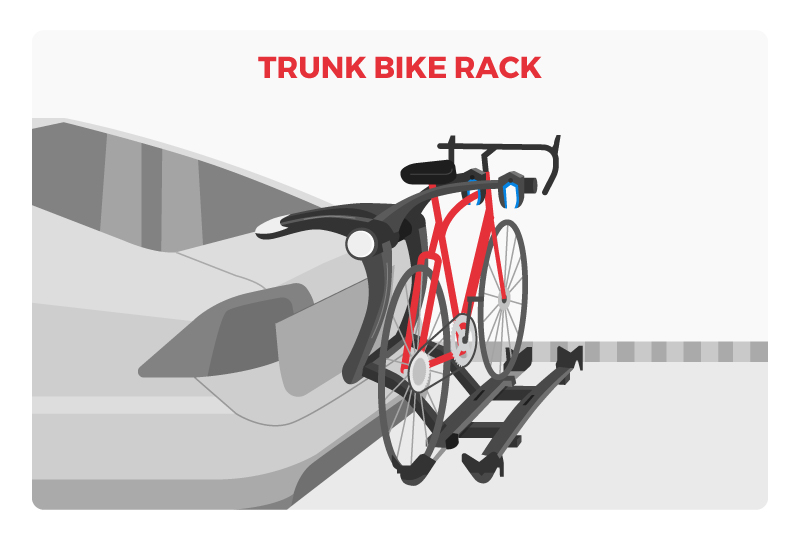
How to Install a Compact Trunk Rack
A trunk rack is usually made for smaller cars. Their foot pads rest at the bottom, and they fasten to the top of your trunk with straps. You want something compact, foldable, or easy to remove. Don’t forget to check for stability before loading your bike.
Trunk rack is an excellent choice to save room for more equipment on your roof. It can also be quite handy if your route is narrow and low. Keep in mind that trunk racks usually only support 1-2 bikes.
If you and your car are suitable for a trunk rack, then let’s start installing it.
Purchase Your Trunk Rack
Now that you’ve selected the type, the next step is to purchase your actual rack. Consider distinct features the rack offers and find the one that appeals to you. You really want to choose a foldable or easy-to-remove rack if your parking space is tight.
Check online to make sure that the model is compatible with your car and can adequately hold your bike. Make sure it won’t break your bike or your car.
Install Your Rack
The best idea is to use the instruction manual that comes with the rack, because each model will have its own steps.
If you need extra help, here are the steps:
- Take out the rack from the packaging
- Take the straps (upper) meant to secure to the top of your trunk and connect the hook
- Tighten the straps, not too tight, just to make sure the rest of the rack is upright. You want the arms (that will hold your bike) to be slightly at an incline.
- Find the other straps on your rack (side & lower), and hook them to the bottom of your trunk (first) and to the sides of your trunk
- Again, tighten the straps to secure the rack.
- Once the bottom and side straps are secure, tighten the upper straps again to make sure it’s really secure.
- Note that different models might be slightly different.
Secure Your Bike On The Rack
Now that your rack is installed, it’s time to place your bike securely on the rack. On a trunk rack, you can attach your bike by the top tube. If you’re not satisfied with the security, you can opt for a third party bike lock or security cable. Check the straps again, make sure everything is still tight. And you’re ready to go.
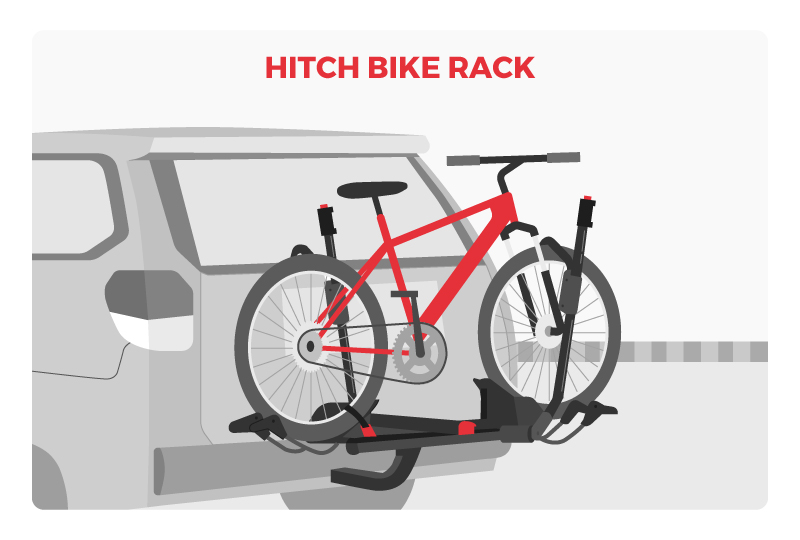
How to Install Hitch Bike Racks
A hitch rack is perfect for vehicles with a hitch. Hitch racks are suited to carry more bikes – up to 5. They attach to your hitch receiver and are very easy to take off and on. If you are carrying a spare tire, you may need a hitch extender, and if you are not confident with the security of your rack, you can always add a hitch stabilizer.
You shouldn’t get a hitch rack, which is complicated to take off and on. You want one that will give you easy access to your car’s rear.
Hitch racks are mostly used for bigger cars and trucks, let’s check out how to properly install it.
Purchase Your Hitch Rack
Again, you want to check online to make sure that the rack is compatible with your hitch. Extra research to ensure that it will be compatible with your bike is also recommended. Read other reviews before purchasing.
Install Your Rack
The first step to installation is reading the instruction manual that comes with your rack. Screw the rack to your hitch and you’re good to go. But here are more detailed steps to help you out.
- Check what type of receiver you have. Most racks will come with a 2-inch hitch receiver.
- Insert the bike rack into your car’s receiver. Make sure the holes in the rack lines up with the holes in the receiver.
- Insert the bolts. Make sure you have the lock washer and the flat washer below the bolt’s head. Thread it in the hole.
- Tighten it with a wrench (provided, or self provided).
- Finally, fit the cotter pin through the hole at the end of the bolt.
- Remove the top pin to move it from the standby position to the ready position and then install the pin back in.
- If anything differs, refer back to your instruction manual.
Secure Your Bike On The Rack
Now that your bike rack is attached, safely install your bike on the rack with its top tube. Third party security is always recommended and essentially up to you. Safety, for you and your bike, comes first.
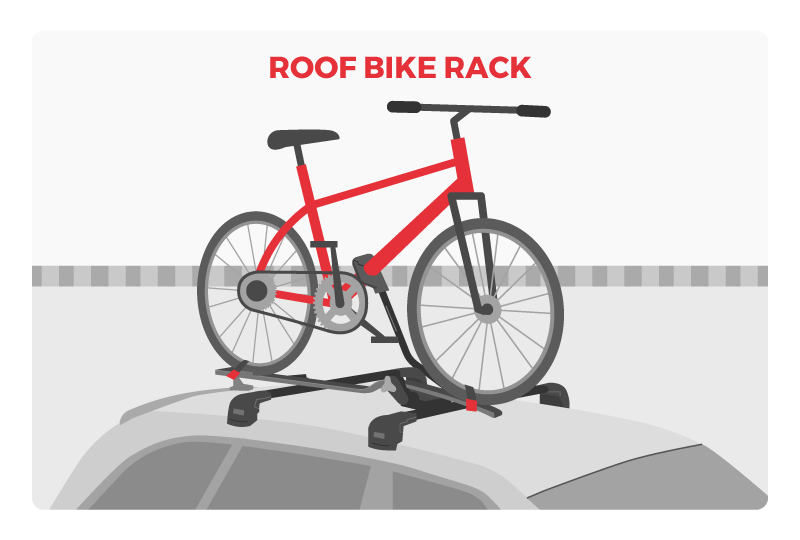
How to Install Roof Bike Racks
Just like the other two. You want a roof bike rack if it’s compatible with your car. The worst thing is a rack coming loose and ruining your bike and maybe even your car. You want a rack with a tight fit.
You need a roof rack and then another to support each bicycle. The complicated part is installing the first rack, or crossbars. Even if you don’t already have a crossbar, this is not a bad thing, you want to customize the distance between the bars. You can store up to 4 bikes if you install extra racks.
If you want your bikes to be transported on top of your car, then wait no more and find out how to install your very own roof rack.
Purchase Your Roof Rack
The first thing you want to do is to purchase a rack. There are countless options out there, so take the time to choose the best one to suit your needs. And then you’ll need to check online for compatibility.
Install Your Rack
Remember, especially for this type of rack, to check the instruction manual because different ones may come with different parts and require different steps. Here are the steps to help you install your roof rack, we’ve kept it as general as possible:
- Prepare the mounting shoes and the clamps. This will be what you need to attach the racks onto the car.
- Once they are ready, slide them into the wing bars. You have to measure your car. The one I tried with was set at 38 mm front and 35 mm in the rear.
- Now that the bars are ready, mount them onto your roof, some cars will have pinholes while others don’t. You want to make sure everything is securely tightened before moving onto the next step.
- Complete the wing bar installation if you have extra parts (rubbers, flaps, and so on).
- Next, you need to prepare the sidearm. Put together all the parts so it can attach to the wing bar.
- Install it on your wing bar and secure it with the parts provided. Make sure the distance for both points is the same. You want to create a straight line.
- If your rack comes with security, you want to cover the bolts and lock the cover, so that your rack is safely bolted.
- Complete the other arms with the other parts provided.
- Once you’ve secured your ensemble, it’s time to load your bike. Safety first, and then you’re ready to go.
Transport Your Bike Safely
I think that’s enough instructions for a day. Are you ready to leave yet? Or are you still looking for a rack to purchase? Either way, I hope this guide helped you out.
Installing a rack is easy once you know how. The most important thing is that you’ve chosen your rack wisely. Make sure it’s compatible, easy to use, and secure. Don’t hesitate to get third party security for your transport.