
Nobody wants to ride a bike with a badly adjusted rear derailleur. Fixing a rear derailleur is not something you should stress over, we can help guide you through step by step until you are ready for a smooth ride.
This article will go over all the tools and introduce the components you need to familiarize yourself with in order to fix your rear derailleur. At its core, this article is meant to help you adjust your rear derailleur.
Table of Contents
What You Need To Know
A little background before you meddle with your bike. Get to know the rear derailleurs. They are fashioned with limit screws to stop the derailleur from going into the spoke or the frame. It keeps them from going too far outwards and inwards.
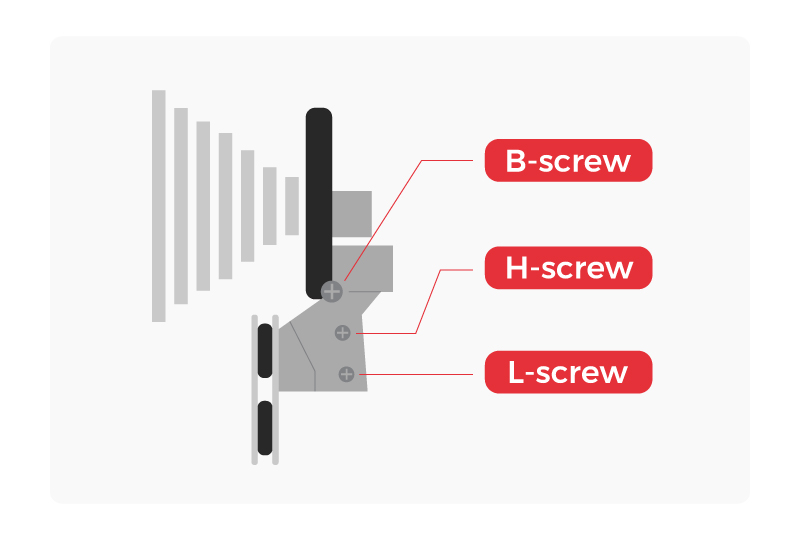
There are 3 limit screws:
- B-Screw: B-tension adjustment
- H-Screw: High gear limit stop
- L-Screw: Low gear limit stop
Essentially, a derailleur derails from one sprocket to another. The hockey pulley is the one that moves the chains. When you shift to a lower gear, the shift cable will derail and move to a bigger sprocket. If you want to go fast on a smooth road and shift to a higher gear, the derailleur will shift to a smaller sprocket. When you shift gears, the length of your chain adjusts.
The Tools You’ll Need
During this process, you want to come prepared with some necessary tools.
Tools:
- Repair stand (optional)
- Phillip’s screwdriver
- Hex wrench
- BT 2 Cable stretch
- Cable cutter
- Lubricant
- Rags
Adjusting The H-Screw
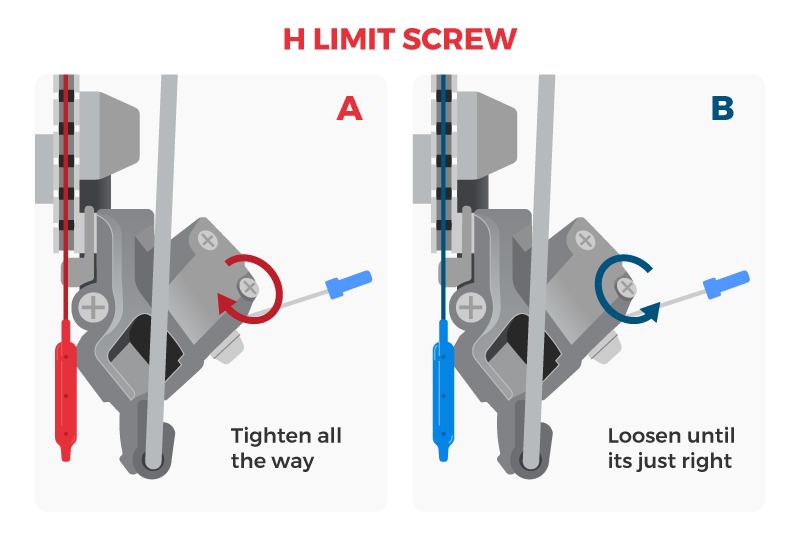
The H limit screw should be labeled, but if it’s not, try it out and watch the derailleur. Once you’ve found the limit screw, you want to adjust it. First you want to tighten it all the way. And then you want to loosen it until the H limit screw is directly under the smallest sprocket.
You want to tighten it again with one-half turn. Try pedaling and listen for noises. Once you hear the noise you want to loosen it again until you can hear rubbing between the chain and the next cog. Now, you want to loosen the H-screw again, this time one quarter turn at a time until you can’t hear the noise anymore.
Remember, on a H limit screw (outer limit), turning it clockwise will move the derailleur to the left and turning it counterclockwise will move the derailleur to the right.
Adjusting The Cable
Now that you’ve set the outer limit, the next thing you want to do is adjusting your cable. You want to make sure that the shift aligns with each sprocket/cog. You can do this with the barrel adjuster.
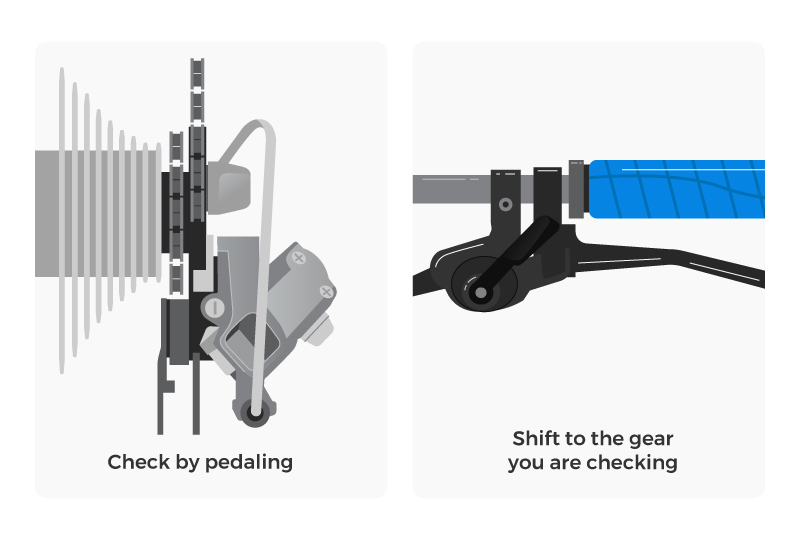
You want to go with the largest chain ring, but if your bike has three, shift to the middle chain ring. You want to pedal and click, make sure that each click moves the chain to the next gear.
If there’s any error, start again. Move the lever back to the outermost sprocket and adjust the barrel by doing one full turn counterclockwise.
Repeat this process until your chain behaves accordingly.
If your chain jumps to move two sprockets with each click. You want to shift back to the outermost sprocket and rotate the barrel adjuster clockwise. Do one full turn and repeat the clicking process.
Once this is resolved, you can start fine-tuning.
Check each cog, one at a time. If you hear a noise coming from the chains, you want to turn the barrel adjuster clockwise until you don’t hear the noise anymore. You want to turn the adjuster a quarter of a turn. Repeat the process for each cog.
Remember that turning the barrel adjuster clockwise will reduce the tension in the chains and move it towards the frame, while turning it anticlockwise will increase the tension and move it closer to the wheel.
For Mountain Bikes
The barrel adjuster on a mountain bike is usually on its shifter. Turning it counter clockwise from the smallest sprocket up to the largest will increase its cable tension. Meanwhile, turning it clockwise when shifting down, from the largest sprocket to the smallest sprocket will decrease its cable tension.
Road Bike
The same thing that happens on a mountain bike goes for a road bike. However, on a road bike the barrel adjuster is usually located on the derailleur or cable housing.
Adjusting The L-Screw
The L screw is the low limit screw. Adjusting it is very similar to adjusting an H limit screw.
First you want to tighten it as much as possible and loosen it slightly until the recommended position. You want to protect the derailleur from shifting into the spokes of the bicycles and out of the sprockets.
You want to shift it to the largest chain ring. If it doesn’t reach the largest chain ring, it means that you tightened it too much. The same goes if it shifts slowly, or if there’s noise when you shift. You want to shift it back, loosen up the L limit screw and try again. Repeat the process until it reaches the largest chain ring.
Once it moves without trouble or noise, your L limit screw is set. The L limit screw is meant to limit the chains from going into the wheel.
Remember, the L screw is the inner limit, turning it clockwise will cause the derailleur to move to the right and turning in counter clockwise will cause the derailleur to move to the left.
Adjusting The B-Screw
The spacing between the guide pulley and the sprocket is controlled by the body-angle screw, the B screw.
Most bikes will want a gap of 5 mm to 6 mm. This is when you use your hex wrench. It will help you get the perfect gap.
You can easily increase the gap by tightening the B screw, and you can decrease the gap by loosening the B screw. If you do any serious changes, you want to double check your cable tension.
If you turn the B screw clockwise, it will move the jockey wheel away from the cassette. Turning the B screw counter clockwise will move it closer to the cassette. If the gap is too close, shifting will feel harder because moving it will require more force, but if it’s too far apart, shifting will not be precise.
Lubrication
Once your derailleur is adjusted you want to drop lubrication to your chain. Lubrication goes a long way to help you maintain a long-lasting chain. It will prevent rust and dirt and shift your gears smoothly. Don’t lubricate too much and you’re good to go. Enjoy your next ride.